I’ve Signed the Contract – What Happens Next?
After signing the contract, you’ll be invited to:
- Register on the platform
- Start the onboarding process
Please check your inbox for two separate emails:
- "Activate your account"
- "Time to party 🎉 Set your onboarding language ☀️"
What to Do After Receiving Both Emails
1. Activate Your Account
- Open the email titled "Activate your account"
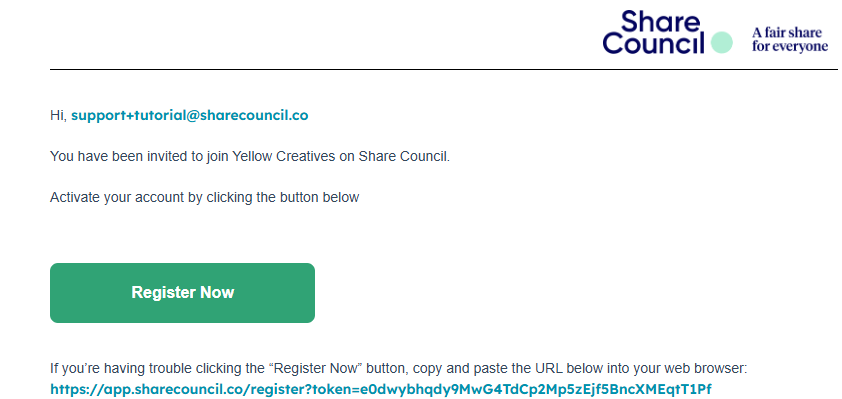
- Click the activation button ‘Register Now’:
- You’ll be redirected to the registration page (see image below)
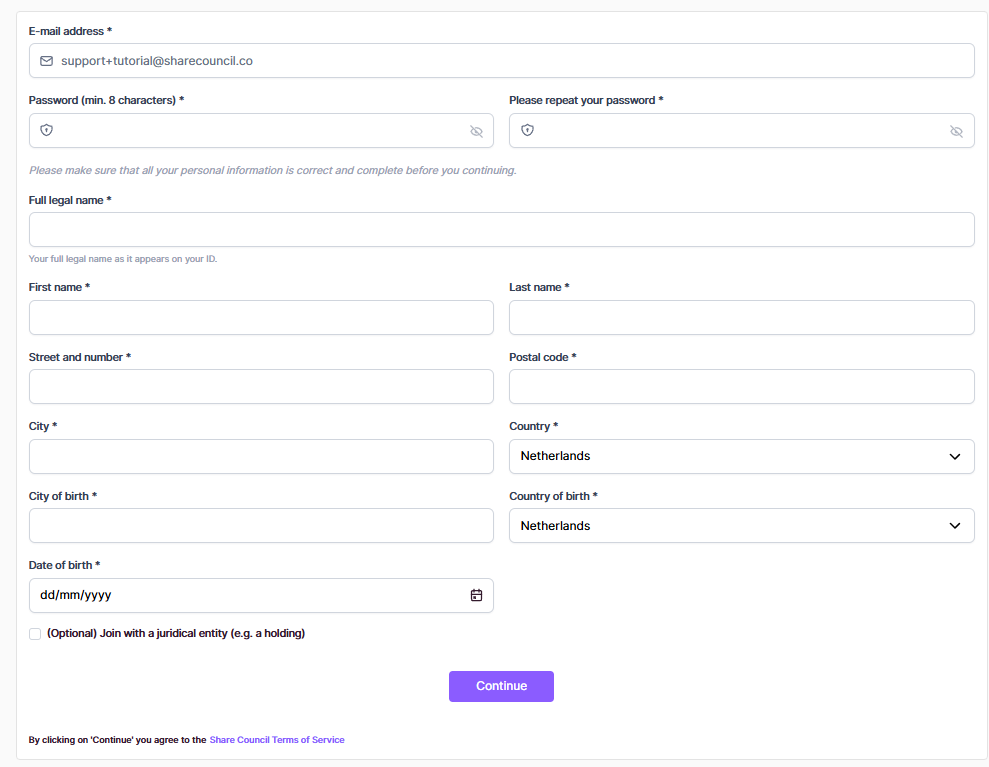
Once you’ve completed your registration, you’ll be directed to your Profile Page, where you can:
- Review and update personal details
- Change your email or password
- Customize notifications, etc.
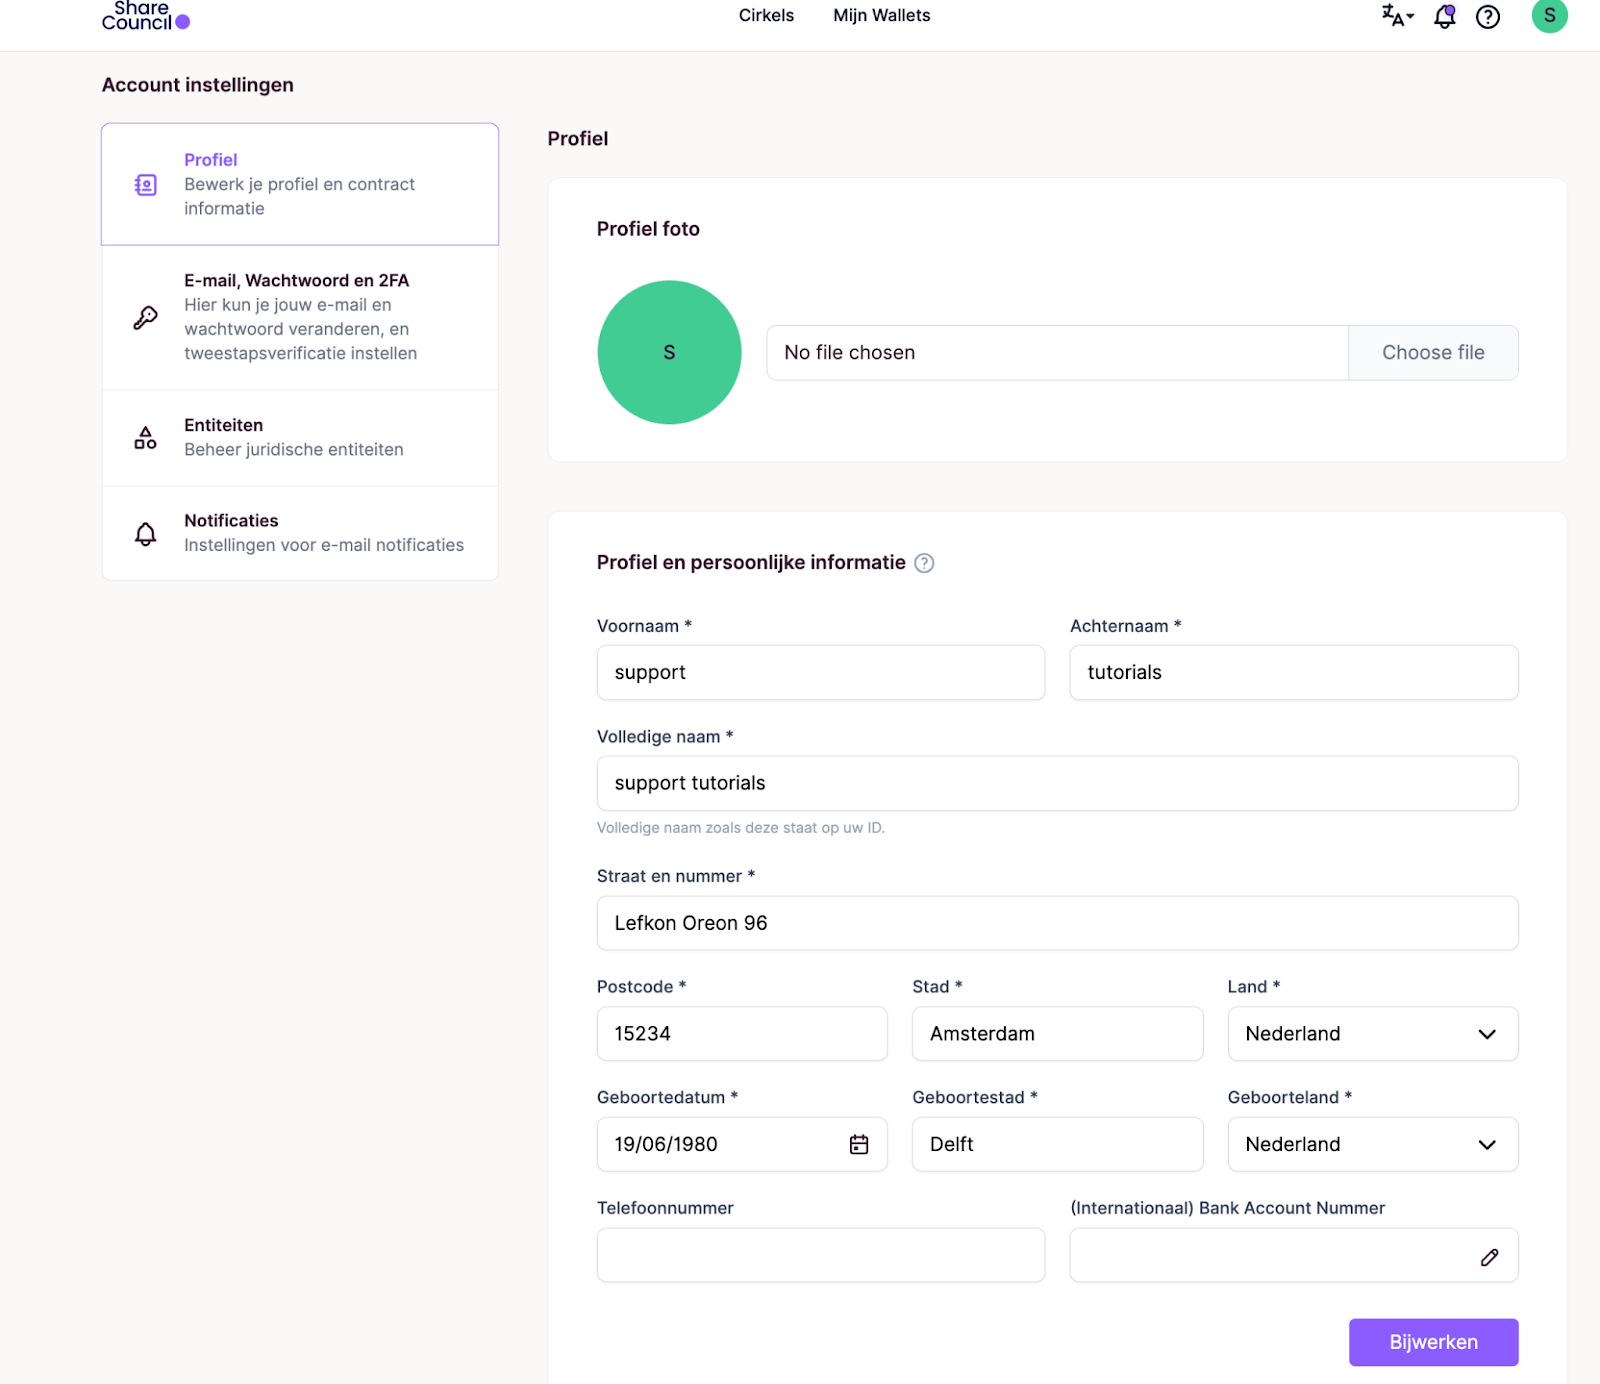
You can revisit this page anytime by clicking the user icon in the top-right corner of the platform and selecting
in the dropdown menu.
Get Familiar with the Platform
At the top of the platform, you’ll find two key features:
- Circles – this leads to your Company Dashboard
- My Wallets – this leads to your Personal Dashboard
For the onboarding steps, always use the Company Dashboard. When completing any task from tutorial emails (STEP 2, STEP 3…), make sure to always access the company dashboard by clicking "Circles".
2. "Time to party 🎉 Set your onboarding language ☀️"
- Open the email titled "Time to party 🎉 Set your onboarding language ☀️"
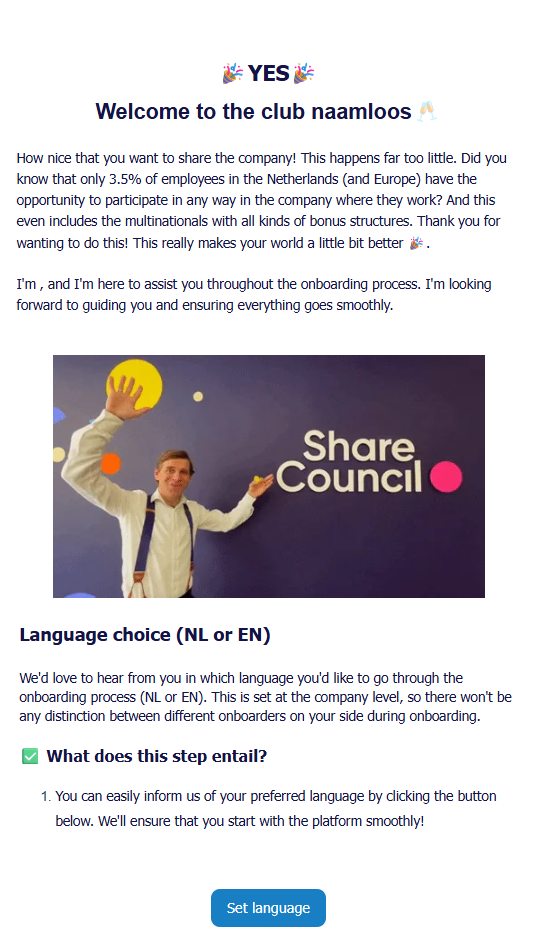
- Scroll to the bottom and click the
- You’ll be taken to STEP 1 – Language

Here, you’ll:
- Confirm your email
- Select your preferred language (NL or EN)
- Click
✅ You’ll see a confirmation message: "Thanks for submitting the form."
This completes STEP 1, and future tutorial emails (STEP 2, STEP 3…) will be sent in your selected language.
✅ Summary
Make sure you have:
- Activated your account (check inbox/spam for "Activate your account")
- Registered on the platform
- Completed STEP 1 by selecting your onboarding language
From this point forward, each time you receive a tutorial email (STEP-2, STEP-3…), simply log in to the platform to complete the next steps.
Once you complete STEP 1, you will immediately receive in your inbox the STEP 2 e-mail.
STEP 2 – Welcome to the Platform & Entity Setup
You will receive this email:
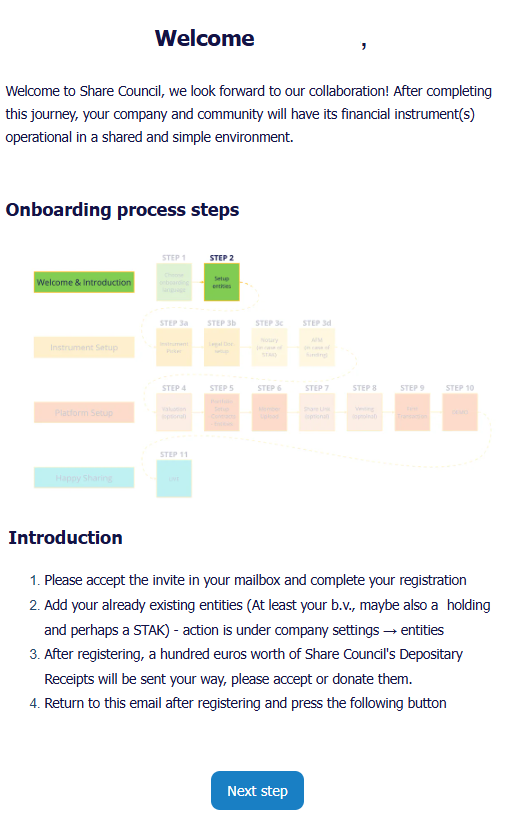
The goal of STEP 2 is to register the entities involved in your co-ownership setup. These may include:
- The company where investors or employees will become co-owners
- The company that manages and transfers ownership instruments
(Note: 1 and 2 are often the same company, but not always) - The STAK (foundation managing ownership certificates)
Registering a Company on the Platform
You’ll need each company’s KVK number.
Steps:
- Log in to the platform
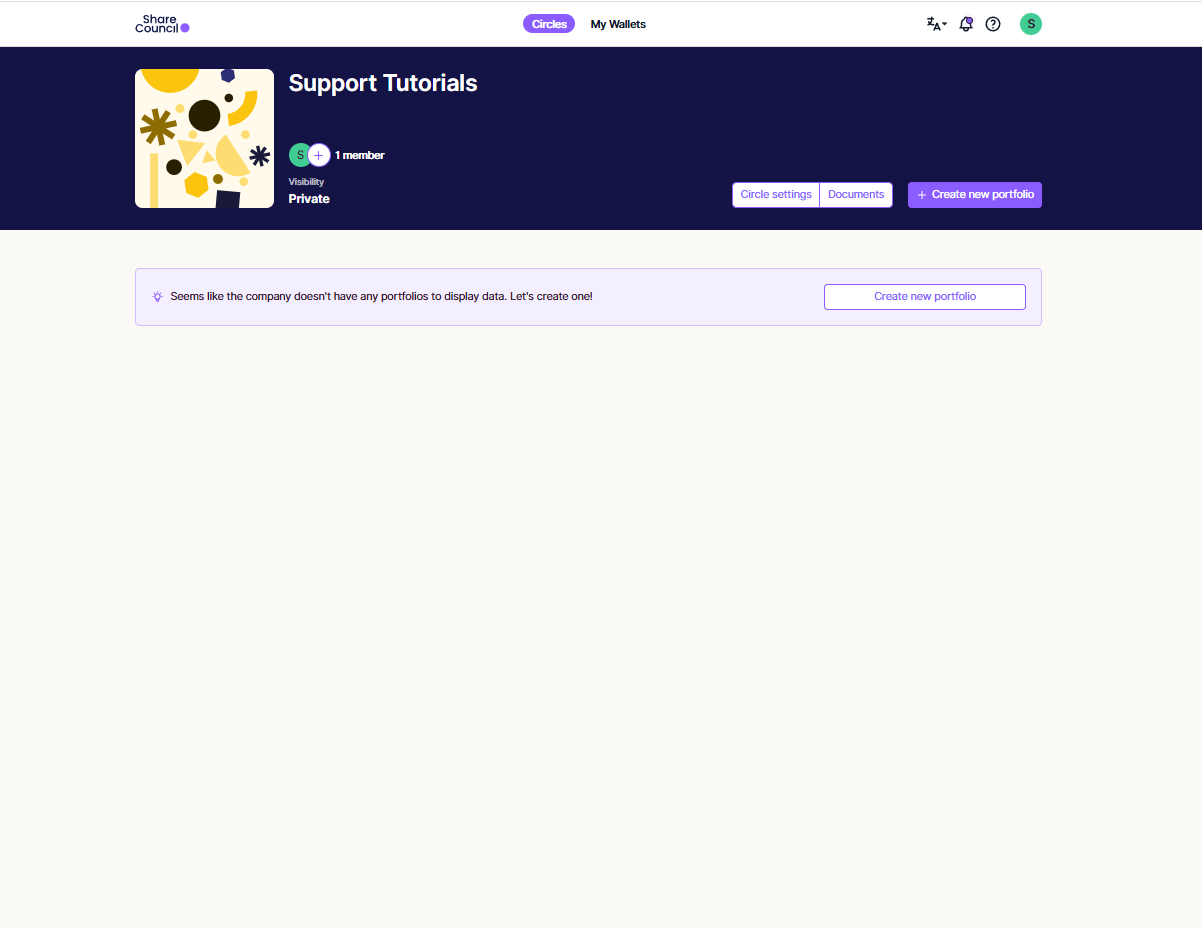
- Click "Circles" to enter the Company Dashboard
- If you don’t see the correct view, make sure "Circles" is selected at the top
- Click on "Circle Settings" (see image)
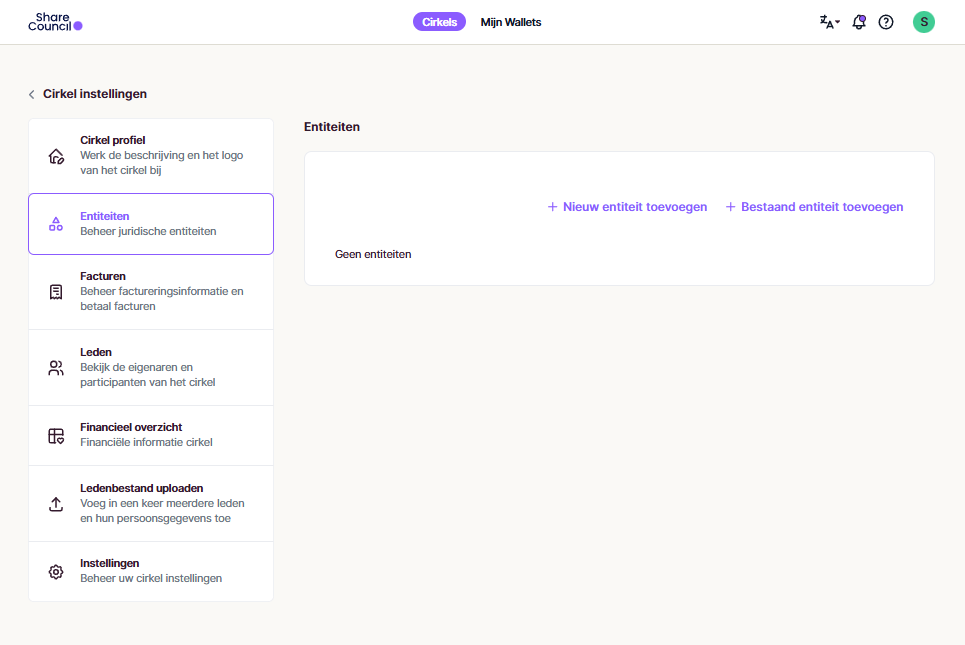
- In the left-hand menu, go to "Entities"
- Click "Add new entity"
- Enter the company’s KVK number and click confirm
- Repeat for each company you need to register


🎥 A video tutorial for STEP 2 is available here: https://secure.vormats.com/engage/391fda8f-32cc-4144-a477-e6f3d9962255
After you’ve added all the required entities on the platform, return to your email inbox, open the 'STEP 2 – Welcome to the Platform & Entity Setup' email, scroll to the bottom, and click on to continue.